BRONZE PROCESS
Bronze casting is first and foremost a transfer process. Most of the creative work is first completed in another medium such as clay, wood, plaster, wax, etc. Then it is converted into a wax model using piece mold making materials like plaster or rubber molding compounds. After the piece mold is completed each section is coated with a thin layer of wax then assembled in whole or in part depending the scale of each section and/or the amount of bronze a given foundry can pour. Each wax section is gated with a system of wax rods then incased in investment. The gating system will eventually allow the molten bronze to enter the final investment mold while fumes and air are channeled out. Hollow channels and hollow shapes (in the form of the original object) are formed in the final investment after a period of wax burnout. Burnout is generally achieved at between 1000 and 1800 degrees Fahrenheit depending on the investment material utilized. I use a traditional mix of plaster, powdered silica (flint) and brick sand (grog) equally measured by volume. After burnout, the investment molds are filled with molten bronze heated to between 1950 and 2350 degrees Fahrenheit depending on the type of bronze employed and the thickness of the casting desired. After cooling the metal casting is removed from the investment whereby it is cleaned, the gating system is detached, and the piece is chased (repairing surface blemishes and casting flaws), then welded and ground as needed. The final stage is the application of a hot or cold patina that establishes its final surface and coloration. It is a very time consuming process
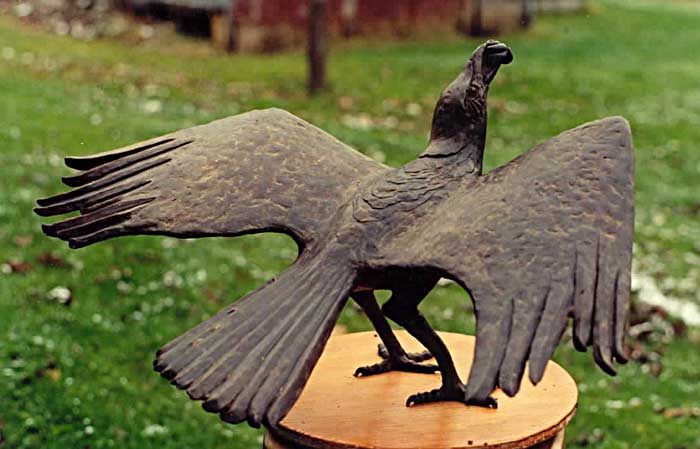
Casting Crows for the Wold memorial.
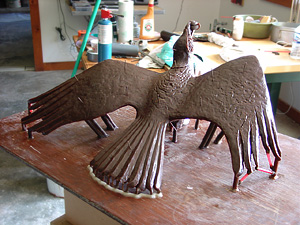
Wax is the medium I prefer to model with. When warmed it becomes soft and can be as pliable as clay depending on its composition. When it cools to room temperature it becomes hard again. Unlike clay it doesn't shrink, dry or crack. You can set it aside for years and then continue to work on it.
The wax models for these crows had metal armatures inside. After the modeling for the original was completed multiple piece molds of polyurethane rubber and overlay support plaster mother molds were constructed. Each section of the mold was brushed or sloshed with hot wax. After cooling the wax sections were assembled into a final hollow wax model duplicating the shape of the original object.
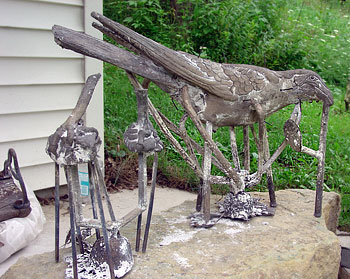
Original abject modeled with soft wax over a wire armature attached to a board.
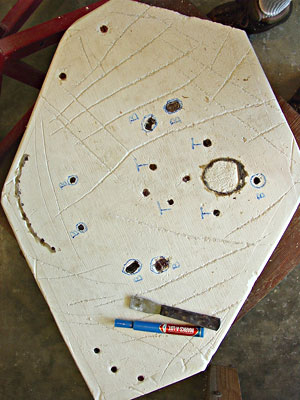
The resulting 3/16 inch thick wax model was then filled with liquid investment after the insertion of core pins. Core pins hold the solidified investment material in place during and after the burnout. After the wax has been melted away the core pins, which are imbedded in the core and outer investment, will hold the core in place during the bronze pour. The core is generally removed after the metal casting has cooled and relieved of all other investment material.
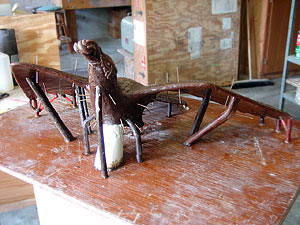
Hollow wax model with gating. Model with core investment inside and core pins.
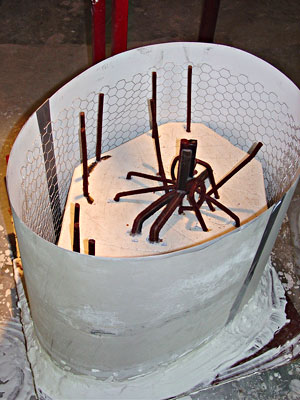
This crow was a little difficult to gate and required two investment pours to complete the mold. The first pour is illustrated below showing a plywood form containing the wax model with a partial gating system attached. The inner core of the bird was already filled with investment.
Form for first investment pour with model. First investment pour completed.
After the form was filled with liquid investment it was removed. Then the investment mold was flipped over to expose the wax tips of the partial gating system (below left). Finally the remainder of the gating system is attached and a new form with reinforcing wire is put in place (below right). This in turn is filled with liquid investment so that it incases the first mold and the additional wax gating extensions. The completed investment (called a flask) is placed in a kiln to burn out the wax. As the wax melts and burns away it creates cavities inside the investment that will then be filled with molten bronze forming the final object. This is why this casting technique is often referred to as Lost Wax Casting
Inverted mold with partial wax gating tips exposed. Additional gating and form for final investment.
After the flask has cooled it is dismantled whereby the initial bronze casting is revealed with the metal gating system attached. After the gating has been removed the piece is further cleaned, repairs and welding all parts together is completed and the final surface color and protective coatings are applied.
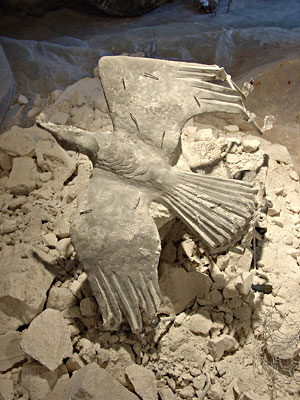
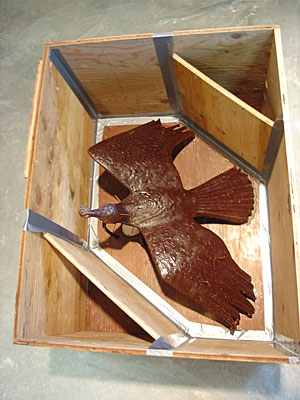
 Two crows after initial removal of investment showing object with gating to be cut away, chased and finished.
The crows illustrated demonstrate a traditional investing technique for casting bronze. In ancient times stone and clay molds were used. Today sand casting and ceramic shell are often employed as investment materials. There are significant differences, however, when properly employed they can all deliver comparable results.
Casting Mission
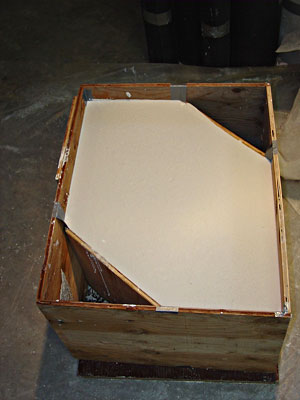
Mission has been the largest and most difficult bronze for me to pour to date. The investment weighted in at over 1700 lbs. The final piece measured 4 feet X 2.5 feet X 9 inches. At the time I could not find a foundry that would agree to pour it in one piece so I did it myself.
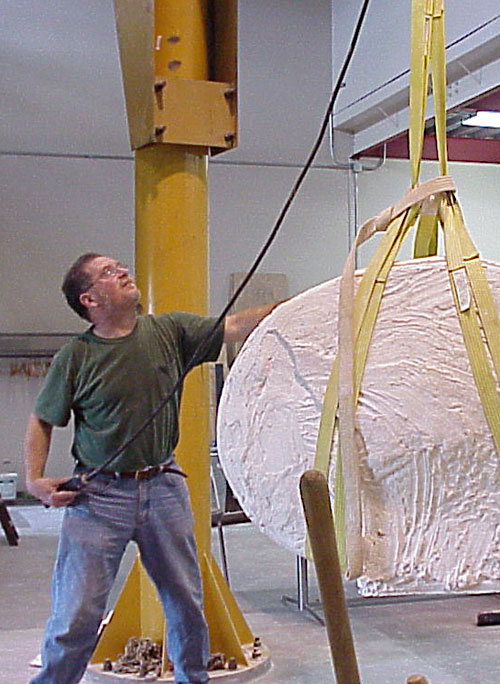
Moving the investment from the burnout kiln into the sand pit.

Crucible furnace with 300 pounds of melted bronze ready to pour.
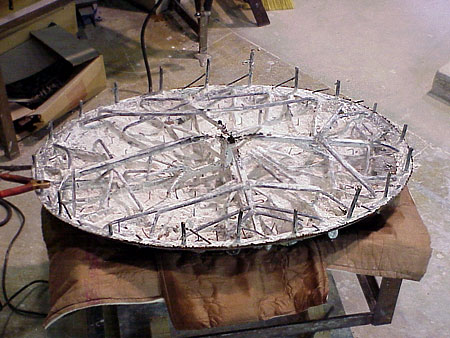
The rough casting with most if the investment removed illustrating a complex gating system attached to the back side.
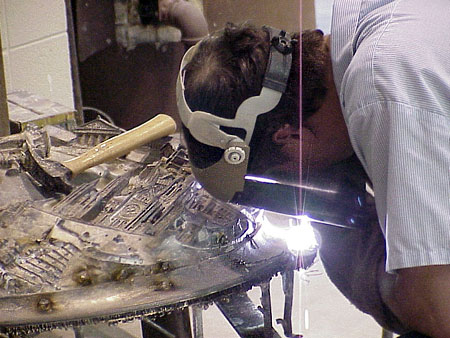
Chasing or cleaning up the rough casting and restoring the final
surface
in
preparation for the final patina and protective coatings.
Refer to the web page for viewing the final piece: baker.htm